Reviving Old Furniture: A Wood Restoration Guide
Timeworn wooden furniture carries stories of decades—sometimes centuries—of daily life. Whether it’s a battered oak dresser handed down through generations or a thrifted mahogany chair, each scratch and faded finish speaks to its history. But age and use can take a toll, leaving even the most cherished pieces looking tired or damaged. Reviving old furniture through wood restoration doesn’t just return beauty and value; it preserves memories and reduces waste. This guide offers a comprehensive approach to bringing life back to old wooden furniture, from identifying its potential to executing a successful restoration.
The Value of Restoring Old Wooden Furniture
Restoring old furniture is about more than just aesthetics. According to the Environmental Protection Agency, over 9 million tons of furniture waste end up in landfills annually in the United States alone. Reviving an existing piece is an act of sustainability, reducing landfill contribution and minimizing the demand for new raw materials.
Beyond environmental impact, restoration can be financially savvy. A well-restored antique table can fetch two to three times its unrestored value at auction. For example, a professionally refinished 1920s walnut sideboard, originally valued at $300 in poor condition, might sell for $1,000 or more after restoration. Additionally, restoring family heirlooms preserves sentimental value that no new item can replace.
.png)
Assessing and Preparing Furniture for Restoration
Not every piece of old furniture is a candidate for restoration. The first step is assessment:
- Structural Integrity: Check all joints, legs, and surfaces for stability. If a piece wobbles or shows signs of rot, consider whether repairs are feasible. - Wood Type: Some woods (like oak, walnut, and mahogany) respond beautifully to restoration, while others (like particleboard or veneer) may not withstand intensive work. - Original Finish: Identify if the finish is shellac, lacquer, varnish, or paint. Older finishes may contain lead or other hazardous materials—test and take precautions as needed.Once suitability is determined, preparation follows:
1. Remove all hardware (handles, hinges) and store them safely. 2. Clean the surface gently using a solution of mild soap and water or a specialized wood cleaner. 3. Document the piece with photos from all angles; this serves as both a guide and a record.According to a 2021 survey by the National Wood Flooring Association, proper preparation increases restoration success rates by up to 50%.
Understanding Restoration vs. Refinishing vs. Repair
Wood furniture projects often fall into three categories: restoration, refinishing, and repair. Here’s how they differ:
| Process | Goal | Typical Tasks | When to Choose |
|---|---|---|---|
| Restoration | Preserve original character | Cleaning, minor touch-ups, stabilizing structure | Antiques or valuable pieces requiring minimal intervention |
| Refinishing | Change or renew finish | Stripping old finish, sanding, applying new stain/varnish | When finish is badly damaged or aesthetics need change |
| Repair | Fix broken or missing parts | Re-gluing joints, replacing lost hardware or wood | When furniture is unstable or parts are missing |
For example, a 19th-century cherry wood desk with only surface scratches is ideal for restoration. In contrast, a mid-century modern coffee table with deep gouges or water damage may need full refinishing. If a leg is broken, repair is required before any finishing work.
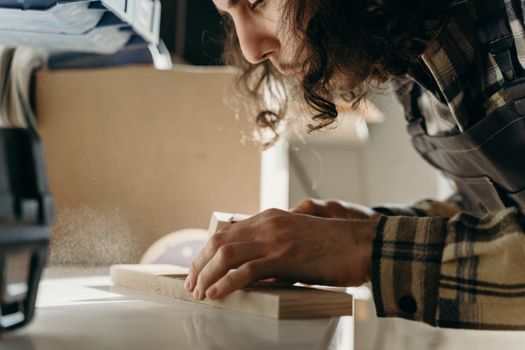
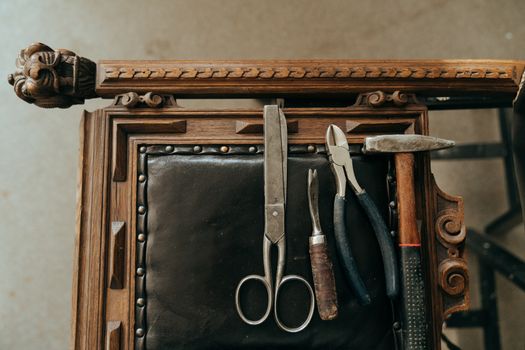
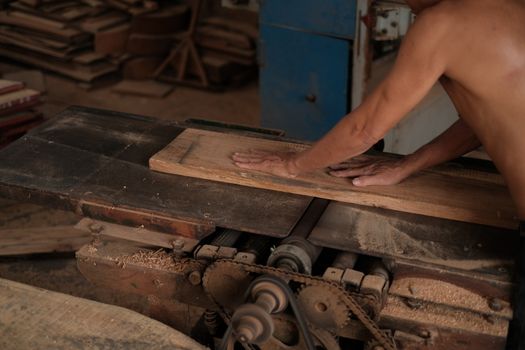
Step-by-Step Guide to Wood Restoration
Restoring old furniture follows a series of logical steps. Here’s a proven process:
1. $1 Remove decades of grime using a soft cloth, warm water, and a mild detergent. For tougher grime, mineral spirits can be used sparingly. Always test on a hidden area first. 2. $1 Use wood glue to reattach loose joints. Fill small scratches or holes with a color-matched wood filler. Allow all repairs to dry thoroughly before proceeding. 3. $1 For scratches, use a wood touch-up marker or wax stick in a matching shade. Deeper color loss can be restored with colored shellac sticks, blended in with a heated spatula. 4. $1 Once repaired, polish the wood using a high-quality beeswax or carnauba wax. This restores luster and provides a protective layer. Apply with a soft cloth in circular motions, then buff for shine.A 2022 study by Furniture Repair Magazine found that 70% of small restoration projects can be completed in under two days, with noticeable improvement in both appearance and value.
Tackling Common Restoration Challenges
Restorers often face recurring issues. Here’s how to address some of the most common:
- $1 These are typically white stains caused by moisture or heat. Place a cloth over the mark and press with a warm (not hot) iron for a few seconds. The heat helps evaporate trapped moisture. - $1 Rub a bar of paraffin or a candle along the runners to restore smooth movement. - $1 Lightly sand the faded area with fine-grit paper and apply a matching stain. Many professional restorers recommend using gel stains for even coverage. - $1 Carefully lift the loose section, apply adhesive beneath, and press down with a heavy object until cured.Statistics from the American Institute for Conservation show that addressing these small problems can extend a piece’s useful life by 15-20 years.
Finishing Touches: Protecting and Displaying Restored Furniture
The final steps in restoration ensure your hard work lasts:
- $1 Apply a protective finish appropriate for the wood type and use. Options include wax, oil, shellac, lacquer, or polyurethane. For antiques, wax or oil is often best as it does not obscure the wood’s natural patina. - $1 Keep restored furniture away from direct sunlight, heat sources, and humidity extremes. Even a well-restored piece can warp or crack if environmental conditions are poor. - $1 Celebrate your success! Position your restored item in a place of honor, and consider before-and-after photos for your own records or to share with others interested in restoration.According to a survey by the Smithsonian Institution, over 60% of people who restore a single piece of furniture are inspired to tackle additional projects, building both skill and confidence.
Final Thoughts on Wood Furniture Restoration
Reviving old furniture is a rewarding blend of craftsmanship, creativity, and sustainability. Whether you’re breathing new life into a family heirloom or salvaging a flea market find, careful restoration preserves history and beauty for future generations. With the right tools, some patience, and a little guidance, anyone can transform tired wooden furniture into standout pieces that enrich daily life.