Measuring wood accurately is the cornerstone of any successful carpentry project. Whether you’re building a bookshelf, framing a door, or crafting custom cabinetry, precise measurements ensure structural integrity, aesthetic appeal, and efficient use of materials. Mistakes in measurement can result in wasted wood, increased costs, and frustration. Yet, despite its importance, measuring wood is often taken for granted or done hastily, leading to the old carpenter’s adage: "Measure twice, cut once." In this article, we’ll dive deep into how to properly measure wood for carpentry projects, explore the best tools and techniques, and share expert tips for getting it right every single time.
The Importance of Accurate Measurement in Carpentry
Accurate measurement is more than just a preliminary step in carpentry—it’s a critical foundation. According to a 2022 survey by Woodworking Network, nearly 38% of costly mistakes in woodworking projects stem from inaccurate measurements. Unlike other materials, wood can be expensive and unforgiving; once cut, it’s difficult to correct errors without starting over or compromising the project’s strength and appearance.
When measuring wood, even small inaccuracies matter. For instance, a miscalculation as minor as 1/16 of an inch can cause joints not to fit, doors not to close, or shelves to be uneven. Precision ensures that all parts fit together seamlessly, reduces material waste, and saves time during assembly.
.png)
Essential Measuring Tools for Carpentry Projects
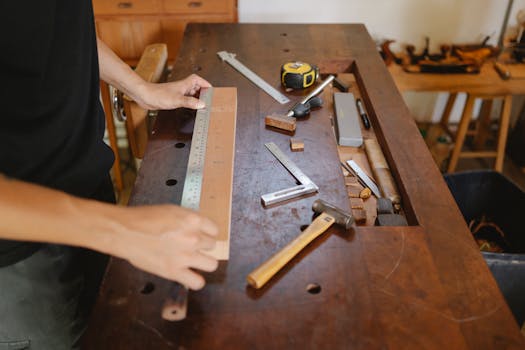
Before starting any project, it’s important to familiarize yourself with the right measuring tools. Each tool serves a specific purpose and offers different advantages depending on the type of measurement required:
| Tool Name | Main Use | Accuracy Level | Best For |
|---|---|---|---|
| Tape Measure | Measuring lengths and widths | ±1/16 inch | General carpentry, framing, large panels |
| Combination Square | Marking right angles and short distances | ±1/32 inch | Joinery, marking lines, checking squareness |
| Caliper | Measuring thickness and depth | ±0.001 inch | Fine woodworking, precision fitting |
| Marking Gauge | Transferring dimensions, scribing lines | ±1/64 inch | Repetitive measurements, joinery |
| Laser Measure | Quickly measuring long distances | ±1/8 inch | Room layouts, flooring, large projects |
For most home carpentry projects, a tape measure and combination square will cover the majority of needs. However, for fine woodworking or cabinetry, adding a caliper and marking gauge to your toolkit can dramatically improve accuracy.
Understanding Wood Dimensions: Nominal vs. Actual Sizes
One of the most common sources of confusion in carpentry is the difference between nominal and actual wood sizes. In North America, lumber is typically sold by its nominal size (e.g., 2x4, 1x6), which refers to the rough cut measurement before the wood is planed and finished. The actual size, however, is typically smaller due to this finishing process.
For example, a standard "2x4" actually measures about 1.5 inches by 3.5 inches. This discrepancy can cause significant issues if not accounted for in project planning. According to the American Softwood Lumber Standard (PS 20-20), the difference between nominal and actual sizes can be as much as 0.5 inch per dimension.
Here’s a quick reference for common sizes:
| Nominal Size (inches) | Actual Size (inches) |
|---|---|
| 1x4 | 0.75 x 3.5 |
| 2x4 | 1.5 x 3.5 |
| 2x6 | 1.5 x 5.5 |
| 4x4 | 3.5 x 3.5 |
| 1x6 | 0.75 x 5.5 |
Always double-check the actual size with your measuring tools before making any cuts or finalizing your design. Relying on nominal sizes can lead to misaligned joints or wasted materials.
Step-by-Step Process for Measuring Wood Accurately
To measure wood precisely for your carpentry project, follow this proven step-by-step approach:
1. $1: Begin with a detailed project plan or drawing, noting all required dimensions. If converting between metric and imperial units, use a calculator and double-check conversions. 2. $1: Check for warps, knots, or defects that might affect your measurements. Always measure from a straight, true edge. 3. $1: Choose a tape measure for long lengths, a combination square for corners, and a marking gauge for repeated or parallel measurements. 4. $1: Place the tool firmly against the reference edge. Read the measurement at eye level to avoid parallax errors. Mark the measurement with a sharp pencil or marking knife for greater accuracy. 5. $1: Use the "V" mark method—draw a small 'V' pointing to your measurement line. This is more precise than a single line and makes it easier to see the intended cut. 6. $1: Re-measure your mark from the opposite end or side. Confirm dimensions match your plan. 7. $1: The saw blade removes material (the kerf), typically 1/8 inch wide. Always account for this—cut just outside your marked line to retain the required dimension. 8. $1: For complex projects, label each piece with its measurement and orientation to avoid confusion during assembly.By following these steps, you can dramatically reduce measurement errors and ensure a professional finish.
Common Measurement Mistakes and How to Avoid Them
Even experienced carpenters occasionally fall victim to measurement errors. Here are some classic pitfalls and strategies to prevent them:
- $1: Tape measures can be crowded with numbers and hash marks. In a 2023 Fine Woodworking poll, 21% of DIYers admitted to accidentally reading the wrong scale. Always take a moment to verify whether you’re reading inches, feet, or centimeters. - $1: Wood expands and contracts with changes in humidity. For projects like tabletops, leave a small gap (around 1/8 inch) to accommodate seasonal movement. - $1: Cutting on the wrong side of the line can result in pieces up to 1/8 inch too short. Always cut on the waste side. - $1: A bent tape measure or a chipped marking knife can introduce errors. Regularly inspect and maintain your tools. - $1: Boards can have irregular or rough ends. Always trim one end square before measuring and cutting your final length. - $1: For repeat cuts, use a stop block or marking gauge rather than relying on visual estimation, which can lead to cumulative errors.Taking the time to measure carefully and avoid these mistakes can save hours of rework and costly material loss.
Advanced Tips for Precision Carpentry Measurements
For those looking to elevate their woodworking skills, consider these advanced measurement techniques:
- $1: Instead of relying on repeated tape measurements, use a story stick—a scrap piece of wood marked with all critical dimensions for your project. This method minimizes cumulative measurement errors, especially for repetitive tasks like shelf spacing. - $1: When measuring inside a frame or cabinet, use a telescoping bar or two sticks placed back-to-back, locked in place and then measured outside the assembly. This is more accurate than trying to read a tape measure in confined spaces. - $1: For ultra-precise fitting, digital calipers can measure down to 0.001 inch. Laser measuring tools, now accurate to within ±1/8 inch over 100 feet, can speed up layout work for larger projects. - $1: While pencils are common, a marking knife creates a finer, more precise line, which is especially important for joinery where tight fits are essential. - $1: Always measure and mark from the same reference face and edge throughout your project to ensure consistency.These techniques are standard practice among professional carpenters and can make a noticeable difference in the fit and finish of your projects.
Final Thoughts on Properly Measuring Wood for Carpentry Projects
Proper measurement is the unsung hero of successful carpentry. It bridges the gap between design and execution, ensuring that your creative vision becomes a tangible, durable reality. By understanding the difference between nominal and actual wood sizes, choosing the right tools, and following a careful, step-by-step process, you can dramatically improve both the quality and efficiency of your woodworking projects. Remember, even the most beautiful design or expensive wood is at the mercy of your measuring tape. Take your time, double-check your work, and enjoy the satisfaction that comes from pieces fitting together perfectly.