Woodworking is a craft that has shaped civilizations for centuries, and at its core lies the art of joining wood. Whether building a sturdy dining table, crafting decorative frames, or assembling intricate cabinetry, the strength, appearance, and longevity of wooden projects depend heavily on the joining techniques used. With modern tools and traditional wisdom at our disposal, today’s woodworkers face a wide array of joining options, each with its own strengths, challenges, and ideal applications.
This article explores the most important wood joining techniques, comparing their features, strengths, and common uses. Whether you’re a beginner looking to understand your options or a seasoned woodworker seeking to refine your craft, knowing the right joinery techniques can make all the difference.
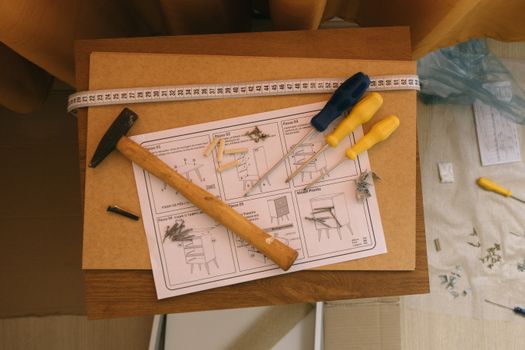
The Importance of Choosing the Right Wood Joining Technique
Not all wood joints are created equal. The choice of technique can influence not only the strength and durability of your finished piece but also its appearance and even the time it takes to build. According to a 2023 survey by the American Woodworking Association, over 65% of woodworking failures in home projects were attributed to improper or weak joinery methods rather than wood quality itself.
.png)
Key factors to consider when selecting a wood joining technique include:
- Structural strength: Will the joint bear significant weight or stress? - Aesthetic requirements: Is the joint visible or hidden in the finished project? - Tools and skills available: Do you have access to specialized tools or are you working with basics? - Speed and simplicity: Does the project call for quick assembly or fine craftsmanship?Understanding these factors helps in selecting the most appropriate joint for your project, ensuring a balance between form, function, and effort.
Classic Joinery Techniques: Dowels, Mortise and Tenon, and Dovetails
Some joinery methods have stood the test of time, favored for their blend of strength, reliability, and elegance.
Dowel Joints A dowel joint uses small cylindrical rods (dowels), usually made of wood, inserted into aligned holes in both joining pieces. This technique is popular for its simplicity and versatility, making it a staple in furniture assembly.
- Strength: Moderate, best for frames, shelves, and panels - Tools needed: Drill, dowel jig, glue - Fun Fact: In 2022, the global dowel market was valued at over $300 million, highlighting its popularity in both mass production and DIY projects.Mortise and Tenon Joints This ancient technique involves inserting a protruding tenon (tongue) of one piece into a matching mortise (hole) in another. Renowned for its incredible strength, mortise and tenon joints are ideal for load-bearing structures such as tables and chairs.
- Strength: Very high, especially when reinforced with glue or wedges - Tools needed: Chisels, saws, mallet, sometimes mortising machines - Historical Note: Archaeologists have found mortise and tenon joints in 4,000-year-old Egyptian furniture!Dovetail Joints Famous for their interlocking “tails” and “pins,” dovetail joints offer unmatched resistance to pulling apart. They are most often used in drawer construction and fine cabinetry where both strength and appearance matter.
- Strength: Excellent, especially for pulling or racking forces - Tools needed: Saws, chisels, dovetail markers or jigs - Statistic: According to a 2021 survey, 78% of professional cabinetmakers rank dovetails as the most attractive joint for visible corners.Modern Solutions: Pocket Hole, Biscuit, and Domino Joinery
With advances in tools and adhesives, several newer techniques have gained popularity for their speed, ease, and clean finish.
Pocket Hole Joinery This technique involves drilling an angled hole into one piece and joining it to another with a specialized self-tapping screw. Pocket hole joinery is fast and requires minimal clamping, making it a favorite for quick cabinetry and face frames.
- Strength: Good for many applications, especially with glue - Tools needed: Pocket hole jig, drill, screws - Example: Over 50 million pocket hole jigs have been sold worldwide since the 1990s, led by brands like Kreg.Biscuit Joinery A biscuit joiner (or plate joiner) cuts matching slots in two pieces of wood. A thin oval “biscuit” (compressed wood) is inserted with glue, swelling to lock the pieces together. This method is perfect for aligning panels and tabletops.
- Strength: Moderate, primarily for alignment and added strength - Tools needed: Biscuit joiner, biscuits, glue - Statistic: Biscuit joinery can increase edge alignment accuracy by up to 40% compared to butt joints without biscuits.Domino Joinery Invented by Festool in the early 2000s, domino joinery uses a specialized tool to cut precise mortises for floating tenons (“dominos”). The result is a fast, highly accurate, and extremely strong joint.
- Strength: Comparable to traditional mortise and tenon - Tools needed: Domino joiner, dominos, glue - Note: Domino joiners are expensive (typically $1,000+), but they’re prized for high-end woodworking.Simple and Fast Techniques: Butt, Lap, and Mitre Joints
Sometimes, simplicity wins—especially for projects where speed or hidden joints are priorities.
Butt Joint The simplest method: two pieces are butted together and fastened with glue, nails, or screws. While easy, butt joints alone are weak and often need reinforcement.
- Strength: Low without reinforcement, moderate with dowels or biscuits - Tools needed: Saw, glue, fastenersLap Joint In a lap joint, one piece is notched so another overlaps, creating a larger gluing surface. This increases strength and is often used in basic frames.
- Strength: Moderate, better than butt joints - Tools needed: Saw, chisel, glueMitre Joint Commonly used for picture frames and trim, a mitre joint is created by joining two pieces at a 45-degree angle. While elegant, it’s not strong unless reinforced (with biscuits, splines, or nails).
- Strength: Low to moderate, improves with reinforcement - Tools needed: Mitre saw, glue, fastenersComparing Wood Joining Techniques: Strength, Appearance, and Application
To help you choose the right joinery for your project, the table below compares key methods:
| Joint Type | Strength | Ease of Use | Appearance | Typical Use |
|---|---|---|---|---|
| Butt Joint | Low | Very Easy | Plain | Simple frames, construction |
| Dowel Joint | Moderate | Easy | Hidden | Furniture, panels |
| Mortise & Tenon | Very High | Moderate/Hard | Visible or hidden | Chairs, tables |
| Dovetail | Excellent | Hard | Decorative | Drawers, cabinetry |
| Pocket Hole | Good | Very Easy | Hidden | Cabinet frames |
| Biscuit Joint | Moderate | Easy | Hidden | Panels, tabletops |
| Domino Joint | Very High | Moderate | Hidden | High-end furniture |
| Lap Joint | Moderate | Easy | Visible | Boxes, frames |
| Mitre Joint | Low/Moderate | Easy | Elegant | Frames, molding |
Specialized and Decorative Joinery: Box Joints, Finger Joints, and Beyond
For projects that demand both visual appeal and strength, specialized joints can elevate the end result.
Box Joint (Finger Joint) Similar to dovetails but with rectangular “fingers,” box joints are strong and visually striking. They’re often used in box construction and drawers where a decorative edge is desired.
- Strength: High, particularly for pulling forces - Tools needed: Table saw or router with jigRabbet and Dado Joints These joints involve cutting a notch (rabbet) or groove (dado) into one piece to house another. Common in cabinetry and bookshelves, they provide more glue surface and a neat, flush appearance.
- Strength: Moderate to high depending on depth and fit - Tools needed: Table saw, routerSpline Joints A thin strip of wood (spline) is inserted into matching grooves in each joining piece, adding strength to mitre or butt joints and improving alignment.
- Strength: Moderate to high, especially for mitres - Tools needed: Table saw, routerScarf Joint Used to join two boards end-to-end, scarf joints are common in long runs of trim or molding. When glued well, they provide a seamless, almost invisible connection.
- Strength: Moderate, mostly for appearance and length extensionWhat You Should Know Before You Join: Tips for Success
1. Preparation Is Key Good joinery starts with accurate, square cuts and careful measurement. Always dry-fit your joints before gluing to ensure a perfect fit. 2. Choose the Right Adhesive Not all glues are created equal. PVA (polyvinyl acetate) is standard for most woodworking, but waterproof or polyurethane glues may be needed for outdoor projects. 3. Reinforce Where Needed Simple joints like butt or mitre can be dramatically strengthened with dowels, biscuits, splines, or pocket screws. 4. Don’t Overlook Clamping The right clamp and pressure can make or break a joint. Too little and the bond will be weak; too much and you risk squeezing out all the glue. 5. Consider Wood Movement Wood expands and contracts with changes in humidity. Design your joints to allow for seasonal movement, especially on wide panels and tabletops. 6. Practice Makes Perfect Many classic joints, like dovetails and mortise and tenon, require skill and patience. Practice on scrap wood before tackling your final project.Final Thoughts on Wood Joining Techniques
Mastering wood joinery opens up a world of creative and functional possibilities. From the speedy assembly of pocket hole joinery to the time-honored elegance of dovetails, each technique offers its own advantages. The best woodworkers know when to choose strength over speed, or beauty over simplicity. By understanding the unique features of each joint and matching them to your project’s needs, you’ll build pieces that are not only beautiful but built to last.