Restoring antique wooden furniture is a rewarding process that combines respect for craftsmanship, a love of history, and practical skills. Unlike basic repairs or routine maintenance, true restoration aims to preserve the character and value of a piece while returning it to its former glory. Whether you’ve inherited a family heirloom or picked up a timeworn treasure at a flea market, learning how to restore antique wooden furniture opens the door to saving a piece of history for generations to come.
In this comprehensive guide, we’ll walk you through the philosophy and preparation behind restoration, essential techniques, the best products and tools, and how to avoid common pitfalls. We’ll also help you distinguish between restoration and refinishing, and provide a comparative overview so you can choose the right approach for your project.
The Philosophy of Antique Furniture Restoration
Restoring antique wooden furniture is more than just fixing what’s broken. It’s about respecting the piece’s historical and aesthetic value. Unlike modern furniture, antiques are often constructed using techniques and woods that are rare today. For example, quarter-sawn oak and hand-cut dovetails were once commonplace, but are now prized features.
.png)
A key principle of antique restoration is “do no harm.” This means preserving as much of the original material and craftsmanship as possible. According to the Smithsonian Museum Conservation Institute, the goal is to maintain both the functional and historical integrity of the piece. Over-restoring, such as sanding away patina or replacing original hardware, can diminish both the value and charm of the furniture.
Before you begin any restoration, take the time to research the piece: - Look for maker’s marks, labels, or stamps for clues about age and origin. - Examine construction methods—hand-sawn versus machine-cut joints can date a piece. - Assess the wood type, as certain species like mahogany, walnut, and rosewood were favored in specific periods.By understanding its background, you can make informed decisions that honor the piece’s past.
Preparation: Assessing and Planning Your Restoration Project
Preparation is the cornerstone of a successful restoration. Start by evaluating the condition of the furniture:
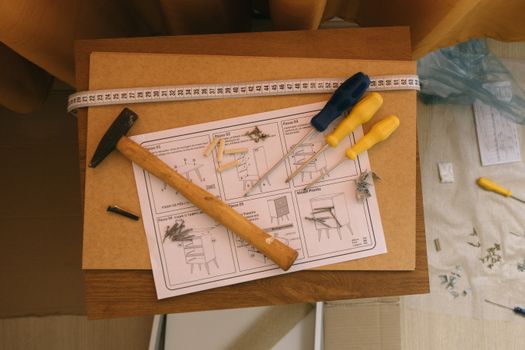
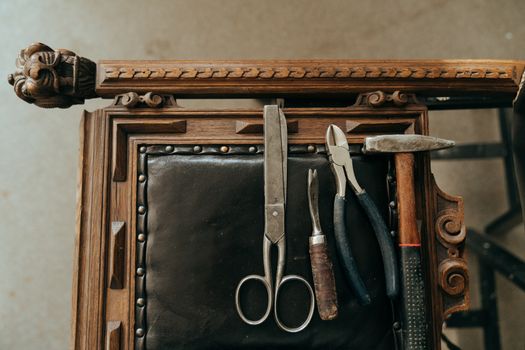
1. $1: Check for loose joints, missing parts, or cracked elements. Gently rock the piece and listen for creaks. 2. $1: Look for scratches, dents, watermarks, and stains. 3. $1: Is the finish flaking, sticky, or faded? Older finishes such as shellac or varnish may need special care. 4. $1: Old glue, non-original nails, or replaced parts can provide insight into past interventions. Next, decide your restoration scope: - $1: Minimal intervention aimed at stabilization and cleaning. - $1: Returning the piece to its original appearance as closely as possible. - $1: Completely removing and replacing the finish, which can affect value. Gather your tools and materials. For most projects, you’ll need: - Soft cloths, fine steel wool (0000 grade), and natural bristle brushes - Wood glue, clamps, and small nails or screws - Wood cleaner, mineral spirits, and touch-up markers - Shellac, wax, or varnish (depending on the original finish) - Personal protective equipment (gloves, goggles, mask)Be sure to work in a well-ventilated area and test any products on an inconspicuous spot.
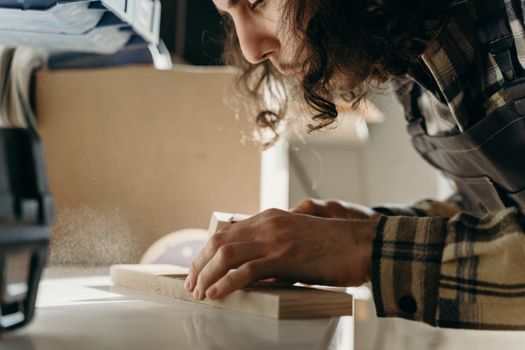
Cleaning and Repairing Antique Wood Surfaces
Cleaning is a critical first step. Years of grime, wax, and smoke residue can obscure the true condition of the wood and finish. Start with the gentlest methods:
- $1: Use a soft brush or microfiber cloth to remove dust. - $1: Mix a few drops of gentle dish soap with water. Dampen a cloth slightly and wipe the surface, then dry immediately. - $1: Commercial wood cleaners such as Howard’s Restor-A-Finish can remove stubborn grime without stripping the finish.For sticky or cloudy finishes, try lightly rubbing with 0000 steel wool dipped in mineral spirits, always moving with the grain.
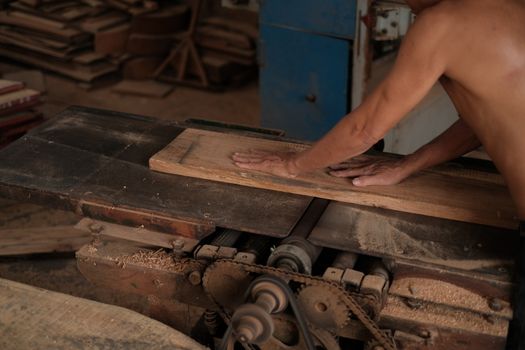
When it comes to repairs: - $1: Carefully disassemble if possible, clean off old glue, and re-glue using wood glue and clamps. - $1: Use matching wood veneer patches or wood filler for small losses. For larger sections, consult a professional. - $1: Minor scratches can be disguised with touch-up markers or furniture polish. For deeper dents, the “steam method” (placing a damp cloth over the dent and applying a hot iron) can raise compressed fibers.According to a 2021 survey by The Furniture Restoration Company, over 65% of antique restoration projects involve cleaning and minor repairs, while only 20% require full refinishing.
Restoring the Original Finish: Shellac, Varnish, and Beyond
Most antique wooden furniture is finished with shellac, lacquer, or varnish. Each has its own restoration challenges and solutions.
- $1: A natural resin, shellac is alcohol-soluble and was popular until the 1920s. It can often be revived by applying fresh shellac or using alcohol-soaked pads to redistribute the existing finish. - $1: More durable than shellac, varnish was common from the late 19th century onward. Clean with mineral spirits and consider applying a thin coat of matching varnish if needed. - $1: Many antiques have a wax topcoat, which can be refreshed with furniture paste wax.If the finish is mostly intact but dull, blend scratches with a blend of wax and oil polish. For more extensive damage, a process called “French polishing” can restore the deep shine of shellac finishes.
$1—it is not reversible and can ruin both appearance and value.
Restoration vs. Refinishing: Choosing the Right Approach
It’s important to distinguish between restoration and refinishing. Restoration preserves as much of the original finish and material as possible, while refinishing involves stripping and replacing the finish entirely. This decision can affect both the value and authenticity of your piece. Below is a comparison:
| Aspect | Restoration | Refinishing |
|---|---|---|
| Original Material Preserved | High | Low to Moderate |
| Historical Value | Maintained | Often Reduced |
| Labor Intensity | Moderate | High |
| Suitable For | Valuable Antiques, Heirlooms | Damaged Beyond Repair, Non-Antiques |
| Common Techniques | Cleaning, Repair, Touch-Up | Stripping, Sanding, New Finish |
According to Antiques Roadshow appraisers, refinishing can decrease an antique’s value by as much as 50%, while careful restoration can preserve or even increase its worth.
Finishing Touches: Hardware, Upholstery, and Final Details
No restoration is complete without attention to the details that make a piece unique. Hardware such as drawer pulls, hinges, and escutcheons often develop a patina that should be preserved. If hardware is missing, seek out period-appropriate replacements from antique hardware suppliers or salvage yards.
For pieces with upholstered seats or panels, consider retaining the original fabric if possible. If replacement is necessary, choose period-appropriate materials and techniques. For example, traditional webbing and stuffing can be sourced from specialty suppliers.
Finally, apply a protective layer of wax or polish to enhance the sheen and protect the wood. Avoid using silicone-based products, as they can cause long-term damage to wood finishes.
Preserving Your Restored Antique for Future Generations
Once your furniture is restored, proper care will keep it beautiful for years. Keep your piece out of direct sunlight and away from heat sources, as UV rays and temperature fluctuations can damage both wood and finish. Maintain humidity levels between 40-60% to prevent warping and cracking—according to the Canadian Conservation Institute, this range is optimal for preserving wooden artifacts.
Dust regularly with a soft cloth and reapply paste wax every 6-12 months. Avoid harsh chemical cleaners, and use coasters or mats to prevent new water rings and stains.
By investing time and care in restoration and preservation, you not only honor the artistry of the past but create a meaningful connection to history in your home.