Keeping your wooden surfaces clean and beautifully polished is both an art and a science. From tabletops that see daily use to intricate trim and hardwood flooring, wood remains a beloved material thanks to its warmth, durability, and timeless appeal. But without the right care, grime, scratches, and dullness can rob wooden surfaces of their natural luster. Whether you have antique cabinets, modern flooring, or heirloom décor, understanding how to clean and polish wood properly is essential for preserving its beauty and value. In this comprehensive guide, we share expert tips, practical science, and actionable methods to keep your wooden surfaces gleaming for years to come.
The Science Behind Wood Cleaning and Polishing
Wood is a living material, even after it's been shaped and finished. It responds to humidity, absorbs oils, and reacts to cleaning chemicals. Not all woods are created equal—oak, walnut, maple, and pine each have unique grains, porosity, and hardness, which influence how they should be cleaned and polished.
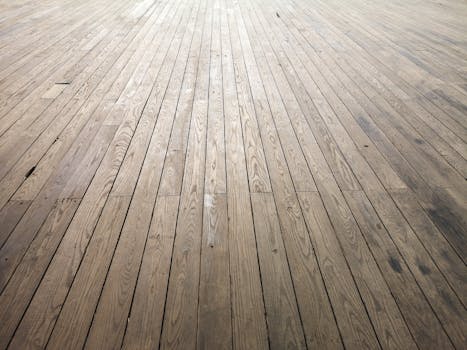
Water is both a friend and foe to wood. While a damp cloth can lift dirt, too much moisture can warp, stain, or swell the wood. On the other hand, dust and dirt act as abrasives, scratching the finish and reducing shine over time. According to the National Wood Flooring Association, abrasive dirt particles can cause up to 80% of visible wear on wood floors if not removed regularly.
.png)
Polishing isn't just about shine—it replenishes oils, fills micro-scratches, and provides a protective layer. The right polish depends on the surface's finish: lacquered, oiled, waxed, or bare. Each requires distinct products and approaches, making it important to match your method to your wood.
Essential Supplies and Natural Alternatives
Before you start cleaning or polishing, assembling the right supplies saves time and ensures safety for both you and your wood. Here’s a checklist of essentials:
- Soft microfiber cloths: Trap dust without scratching. - Mild dish soap: Gentle for routine cleaning. - Distilled white vinegar: Effective for cutting grease on sealed wood. - Olive oil or mineral oil: Natural options for replenishing lost moisture. - Commercial wood polish: Tailored for specific finishes. - Soft-bristled brush: For intricate carvings or grain.For eco-conscious homeowners, natural alternatives can be just as effective as store-bought cleaners. A simple solution of one part white vinegar to three parts water is a safe, non-toxic cleaner for most sealed woods. Adding a few drops of lemon oil not only perfumes but also helps break down grime. For polishing, a mixture of two parts olive oil to one part lemon juice can restore luster without harsh chemicals.
Step-by-Step Techniques for Different Wood Finishes
Not all wood surfaces are finished the same way, so it’s vital to adapt your cleaning and polishing methods accordingly. Here’s a breakdown of expert-approved routines for the most common finishes:
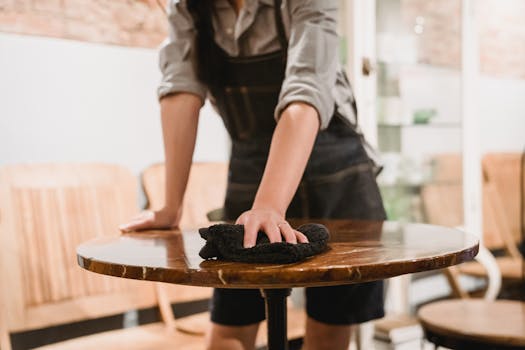
1. $1 Routine: Dust weekly with a dry microfiber cloth. For smudges, use a damp cloth with a drop of mild dish soap, then dry immediately. Polishing: Apply a commercial wood polish or a mixture of mineral oil and lemon juice monthly. Buff with a clean, dry cloth for a streak-free sheen. 2. $1 Routine: Dust frequently. Avoid water, which can cloud the wax. Polishing: Refresh the surface every 3-6 months with a paste wax. Apply in thin layers, allow to dry, then buff with a soft cloth. Waxing too often can cause buildup and dullness. 3. $1 Routine: Dust and wipe with a slightly damp cloth. Polishing: Reapply a penetrating oil (such as Danish oil or tung oil) every 6-12 months. Let the oil soak in according to product instructions, then buff away excess. 4. $1 Routine: Only dust or vacuum. Avoid liquids, as unfinished wood stains easily. Polishing: Occasionally rub with a minimal amount of mineral oil, but avoid over-saturating, which can lead to stickiness and dirt buildup.The following table compares these methods for quick reference:
| Wood Finish | Cleaning Method | Polishing Frequency | Recommended Product |
|---|---|---|---|
| Sealed/Varnished | Damp cloth + mild soap | Monthly | Commercial polish/mineral oil |
| Waxed | Dry dust only | 3-6 months | Paste wax |
| Oiled | Damp cloth | 6-12 months | Danish/tung oil |
| Unfinished | Dust/vacuum | Rarely (only as needed) | Mineral oil (minimal) |
Avoiding Common Mistakes That Damage Wood
Even well-intentioned cleaning can harm wood surfaces if done incorrectly. Here are some of the most common pitfalls and how to avoid them:
- $1 Water is the enemy of wood, especially on floors or unfinished surfaces. Even on sealed finishes, excess moisture can cause swelling, warping, or white spots. Always use a barely damp cloth, and dry immediately. - $1 Bleach, ammonia, and abrasive cleaners can strip finishes and discolor wood. Stick to gentle, wood-safe products. - $1 Liquids like wine, juice, or coffee can stain wood if not wiped up promptly. Blot spills immediately with a dry cloth, then follow with a mild cleaner if needed. - $1 More isn't always better. Overusing polish or wax can create buildup, attracting dust and leaving a sticky film. - $1 Abrasive materials can scratch delicate finishes. Always opt for soft microfiber or cotton cloths.According to a 2023 survey by the American Hardwood Information Center, 63% of wood damage in homes could have been prevented by using proper cleaning techniques and products.
Deep Cleaning and Revitalizing Dull Surfaces
Over time, even well-cared-for wood can lose its shine due to accumulated grime, micro-scratches, or old polish. When routine dusting and polishing aren’t enough, it’s time for a deeper clean.
1. $1 For sealed or waxed surfaces with visible buildup, use a dedicated wood cleaner or a mix of equal parts vinegar and water. Test in an inconspicuous spot first. For wax, apply mineral spirits with a soft cloth, then buff dry. 2. $1 For minor scratches, try a paste of baking soda and water rubbed gently with the grain. For deeper gouges, use a wood filler or touch-up pen matched to your wood’s color. 3. $1 If the wood looks parched, apply a commercial rejuvenating oil or a blend of equal parts olive oil and vinegar. Allow it to sit for 10-15 minutes before buffing thoroughly. Repeat every few months for best results. 4. $1 If you encounter water marks, deep stains, or severe dullness, a professional wood restorer may be needed. These experts use specialized equipment and treatments to strip, re-seal, or refinish wood, restoring it to like-new condition.Maintaining Shine: Preventive Care and Smart Habits
Once your wood is clean and polished, simple habits can keep it looking its best year-round:
- $1 Wood expands and contracts with humidity changes. Use a humidifier in dry months and a dehumidifier in damp climates to maintain indoor humidity between 40-60%. - $1 Place coasters under drinks, mats at entryways, and felt pads under furniture legs to prevent scratches and water rings. - $1 Move items occasionally to prevent uneven fading or wear, especially in brightly lit rooms. - $1 UV rays fade wood finishes. Use curtains, blinds, or UV-blocking window film to protect wood surfaces. - $1 A weekly dust with a microfiber cloth prevents abrasive dirt from dulling the finish.A 2022 study by Wood Floor Business found that regular dusting and humidity control extended the lifespan of finished wood floors by up to 10 years.
Expert Tips for Cleaning and Polishing Wooden Surfaces: Final Thoughts
Caring for wooden surfaces is about more than just aesthetics—it’s a commitment to preserving the craftsmanship and natural beauty of your home’s most cherished features. By understanding the unique needs of your wood’s finish, using the right supplies, and adopting smart maintenance habits, you can keep your wooden surfaces gleaming for decades. Whether you’re caring for a vintage dining table or sleek modern flooring, a little knowledge goes a long way in ensuring lasting shine and durability.